Changing your own kitchen faucet can easily be done by the average homeowner with very little plumbing know-how. However there are a few tips that can make the experience much easier to accomplish that I’ll lay out in this article.
Tools that may be required
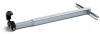
- Basin wrench
- Plumbers putty
- Adjustable wrench
- Multi-tip screwdriver
- Braided supplies
- Cleaning supplies
Getting the right faucet
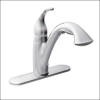 Before you go out and spent a small fortune on a new faucet, ensure it’s the right one for your sink. Kitchen sinks come with different hole patterns that will have to match up with your new faucet. Let’s say you want a single lever faucet with side sprayer and you have a three hole sink(look under the sink), you should ask for exactly that, or perhaps you have a four hole sink but want a built-in spray handle, then you will need a blanking cover or soap dispenser to fill the empty hole.
Taking off your old faucet
- If you have shut-off valves under your sink close both of those or turn off the water to your home.
- Disconnect the supply lines to your faucet. If they are still in good shape you can reuse them but I usually suggest replacement if in any doubt.
- Holding down the faucet will be nuts or other mounting brackets that need to be removed. This usually where the basin wrench is necessary.
- You may also have a side sprayer that needs to be removed. If the faucet is going in the landfill just cut it in half.
- Remove the old faucet and clean the sink surface.
Installing your new faucet
This is the easy part, with every new faucet comes a detailed set of instructions for installing them. Take your time and read the instructions and if you have any trouble hop on the forum and ask for help.
Some Tips for kitchen faucets:
- Make sure the rubber/ plastic base is under the faucet or use plumbers putty to create a water tight seal.
- Spare holes in the sink can be filled with blanking covers, soap dispenser, purified water spout.
- Check the water supplies for wear and replace if necessary.
