Making A Flared Joint
 A flared joint has many applications in the mechanical trades and is easily created with only one simple tool. The benefit of a flared connection is the ability to repeatedly open and close the connection without leaks, as well as the ability to make a connection without the use of flame. Some of the uses for flared connections are:
- Underground plumbing connections
- Water service entrance
- Oil supply lines
- Propane and natural gas connections
- Refrigeration connections
Tools and materials required
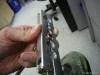
- Flaring tool
- Type K,L soft copper
- Pipe reamer
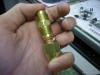
- Flared fitting
- Tubing cutter
- Spring bender / Tubing bender
Using a flaring tool
- Cut a piece of soft copper tubing the desired length.
- Use a pipe reamer or sharp knife to remove the inside burr from the tubing.
- Place flare nut on the tubing.
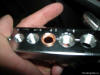
- Place the tubing inside the body of the flaring tool, ensure you use the correct size. Leave a little sticking out of the flaring tool body, about 1/8″ and clamp the flaring body tightly.
- Place the flaring yoke over the body so the flaring cone is centered on the tubing and clamp it into place.
- Now wind in the flaring cone until the flaring cone is fully seated in the body.
- Unclamp and your done.
Tips for flaring
- Don’t over tighten the flaring cone which may cause the copper to split.
- Ensure the flared end mates well with the flared fitting and doesn’t interfere with the threads.
- Use a spring bender or tubing bender to make sharp bends in soft copper as it will not allow the tubing to kink.
- Don’t use joint sealing compounds on flared fittings.
- Always leak test flared gas lines after making any new connection.