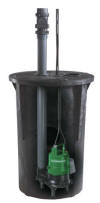
 A sewage sump (with pump); also called a sewage receiving tank, is installed when connection to a gravity drainage system is not possible; such as in the basement of a home, with a septic tank or in the sub-basement of a commercial property.
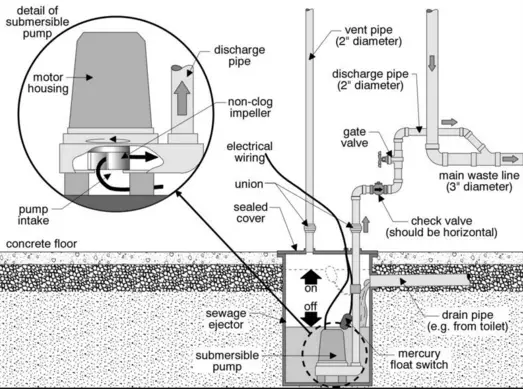
Sewage Sump Basins are manufactured containers with air and water tight covers that have openings for the sewage inlet, pump discharge, fresh air vent as well as electrical connections to the pump and float. The pumping units, called solid handling pumps are constructed of heavy duty cast iron that will stand up well to the harsh environment of being submerged in raw sewage and typically can be purchased with the sump basin as a “package deal”.
Sewage Sump Pumps are mechanically operated (has an electric motor); and therefore, are much more likely to fail than a standard gravity based drainage system and should only be considered when no other possibility exists to connect to the existing drainage.
Sewage Sump Sizing Considerations
Selecting the proper size sewage basin will depend on the anticipated peak demand of all the fixtures draining into it. A single family home should be adequately serviced by a 40 gallon basin, but be sure to check the manufactures specifications. A properly sized sump and pump will prevent the pump from cycling on and off, too frequently. The minimum size of the sewage sump basin may be dictated by your local code, or manufacturer specifications.
When selecting a sewage ejector pump, the things to consider are the height the pump will need to lift the sewage (called “head”) and the GPM (gallons per minute) it can pump at the required head(height).
Residential Sewage Sump Installation
As with all plumbing system installations, permits and inspections will be required for health and safety reasons.
The sewage sump is designed to be installed below grade, with the cover being flush with the finished floor. It should be located close to the fixtures that are being served and in an accessible area so maintenance can be preformed if required.
All the fixtures draining to the sewage sump must be properly trapped, graded and vented just like any other plumbing fixture in accordance with local plumbing codes. A proper p-trap must be installed to local code regulations; a p-trap is filled with water and doesn’t allow sewer gas to travel into the home.
Float Switches – The Sewage Sump Pump’s float must be adjusted so the level of effluent in the sump does not rise higher than 2″(two inches) below the lowest drain inlet, and the float’s lower cut-off should be higher than the pumps inlet. Care must be taken when fastening the float so that it will have a free range of movement. A float that operates a high water alarm may also be installed for added protection in the top portion of the tank.
Venting the Sump – Venting the sewage sump is done the same way as other plumbing fixtures, but the size of the vent may differ depending on the code you fall under. In Canada, a 2″ vent is the minimum size for a sump vent if it receives waste from a 3″ drain and a 3″ vent if it receives waste from a 4″ drain. In the U.S. (IPC), the vent’s size is dependant on the pumps GPM rating and the distance the vent travels.
Discharge Piping – The discharge pipe must be pressure rated from the connection to the Sump Pump until the point where it connects to a gravity drainage system. The discharge pipe must also have the following fittings installed in order in the direction of flow:
- Union – this may be a mechanical joint or a separate fitting. For easy maintenance put one on the vent as well.
- Check valve – this prevents the discharge line from draining back into the sump when the pump turns off.
- Shut-off valve – a full port valve such as a ball valve or gate valve must be installed for maintenance reasons.
The connection to the gravity system may also be regulated by local codes and should be installed with a wye fitting to direct the flow.
Sump Cover – The sump basin’s cover must make an air and water tight seal to prevent sewer gasses from escaping. Manufactured sewage sump basins typically come with all that is required to seal the cover, just follow the manufacturers installation specs.
Additional reading: Gould’s Pump Basics I

