 Need to install or replace a toilet because your old toilet is in rough shape, leaking or just a water hog? Updating and installing a new water efficient toilet is a job the average homeowner can do with some simple tools. Have a read through this guide to see if changing your toilet is a job you want to tackle on your own.
Tools and materials that may be required
- Adjustable wrench
- Hacksaw
- adjustable wrench
- multi-tip screwdriver
- Putty knife
- Braided toilet supply
- Toilet tank and bowl
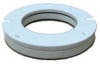
- Wax seal
- Seat
- T-bolts / closet bolts
Before you begin to Install or Replace a Toilet
If you haven’t already purchased your new toilet, measure the distance from the wall to where the bolts are on your existing toilet. Some toilets have different rough-in measurements although most will be 12″ from the wall, it’s best to be certain. You should also make a note of the space you have to work with on either side of the toilet. Find a knowledgeable salesman at your local plumbing fixture supply store and ask him for help picking a new tank and bowl that will suit your situation and needs.
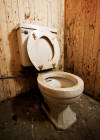
Removing your old toilet
- Start by shutting off the water supply to the toilet with the valve close to the floor under your toilet.
- Since your toilet is quite heavy and easily broken so you should remove the tank from the bowl first.
- With the water shut off, flush the toilet and hold the handle down until all the water that can drain out has done so. Then take a rag and soak up the remaining water in the tank.
- With your hand or a wrench unhook the water supply line to the bottom of the tank.
- To remove the tank, you have to remove the two bolts on either side of the flapper. To do this you will need a screwdriver to hold the bolts in place while you use a wrench to loosen the nuts under the back of the bowl.
- Now to empty the bowl. If you have a plunger, plunge as much water as possible out of the toilet. You can also use a sponge to soak up the water.
- Remove the caps on the base of the toilet. Use a wrench to remove the nuts holding down the bowl.
- Now your ready to remove the toilet bowl; but under it, there will be wax stuck to the base, and water inside the trap of the toilet so have some place to take it where the wax won’t get on anything.
- Take a putty knife or something similar and clean of the wax around the toilet flange and inspect the toilet flange for damage.
- Crumple up a large plastic garbage bag and plug the hole of the flange to keep the smell and gasses out. Just be sure that you will be able to get it out again.
- If the flange is cracked or damaged you may need a plumber to replace it as this goes beyond most homeowners abilities.
- Inspect the floor for damage. If your toilet was leaking the floor may be rotten and this must be repaired before installing your new toilet.
Setting your new toilet bowl
*These instructions are for standard two piece toilets, always read the manufactures instructions.
 *If you have raised the height of the floor by installing tiles or hard wood you need to add on a toilet flange extension. Never use two wax seals to make up the difference.
- Place the flat head of the closet bolts into the flange and slide them to the middle.
- Place the wax seal on the flange, rounded side up. Have the wax seal around room temperature so it can properly mold to the bowl.
- Remove the plastic bag or what ever you used to plug the pipe.
- Slowly lower the new bowl down so the closet bolts line up with the holes on the base of the toilet.
- Firmly rock the bowl side to side until the bowl sits flat on the floor.
- Before tightening the nuts down, place the bottom of the cap (look for “this side up”) and small brass washer over the bolt then tighten down the nuts. Make sure that the bowl is straight and not off center. Alternate tightening from side to side and be careful not to over tighten which can break the porcelain.
- If your bowl is straight and there is no more rocking when pushed on it’s time to put on the tank.
Installing the toilet tank
- Most toilet tanks come with the ball-valve assembly, handle and flapper already installed but if not follow the manufacturer’s instructions.
- Place the sponge gasket over the outlet hole of the tank.
- Place one metal washer on each bolt then slide on one rubber washer to each.
- Place the bolts down through the tank and set the tank down on the bowl lining up the bolts with the holes.
- While holding the bolts in place from the inside of the tank, place a rubber washer on each bolt then the metal washer before the nuts.
- Tighten the two nuts, alternating sides until the tank is firmly held in place, again don’t over tighten.
- Replace the water supply either with a new braided supply or the old one that you removed from the old tank.
- Slowly turn on the supply valve allowing the tank to fill and check for leaks between the tank and bowl. If there are any leaks shut off the water and tighten the leaking areas.
- You may have to adjust the ball-valve assembly to obtain the proper water level inside the tank.
- Now’s the big moment…go ahead flush it. Now flush it a couple more times and check again for leaks around the floor.
- All that is left is to cut the brass bolts off at the base of the toilet and place the caps over top. That wasn’t too bad was it?