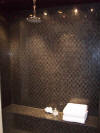
 A custom built shower is one of the most appealing plumbing projects you can do to increase the value of your home. With an overwhelming selection of tiles available you won’t be confined to white for a color and the cost of the materials in most cases are less than a new tub and surround.
This is quite a complex process for a homeowner to undertake and may require building and plumbing permits in your area.
Fore Thoughts
- If you have an area selected where you would like to build the shower, make sure you will have access to a drain, vent, and water lines to connect to.
- Choose your tile patterns that are both aesthetically pleasing and have some non slip textures (for the floor at least).
- Plan out the area so that the tiles can mostly be laid in full to minimize the cut tiles and improve the appearance of the finished shower.
- You can use a preformed shower pan if you are willing to be size limited. You can see one here: schluter.com
- If you run into problem along the way this site has a lot of subject matter experts there to help you. Ceramic tile forums
Tools You May Require
- Hammer
- Circular saw
- Tape measure
- Level 2 foot or smaller
- Utility knife
- Stapler
- Drill
- Tin snips
- Soldering equipment
- Hack saw
- Adjustable wrench
- Screw drivers
- Mortar float / trowel
- Tile cutter
- Builders square
- Plastic pipe glue(ABS,PVC)
Materials You May Require
- Mortar – thick bed
- Thinset mortar latex modified
- Wood framing 2×4″, 2×6″
- Galvanized metal lath
- Schluter Kerdi waterproof membrane
- Nails / screws (galvanized)
- Cement board (or water resistant drywall)
- Three piece drain
- Pipe and fittings
- Preformed membrane corners
- Silicone caulk
Preparing The Area
- Demolish the existing walls and flooring to frame in your shower.
- Rough in the water lines and shower control.
- Bring up the drain pipe and install the bottom of the three piece drain about a 1/4″ from the floor.
- Cover the floor with building paper.
- Build a curb around the shower floor (3 stacked 2″x4″) to keep in the water.
Making The Shower Pan
 At this point you can either install the preformed shower base or start laying the mortar bed.
- The mortar bed must be slope up and away from the drain at about 1/4″ per foot. Using a level from the drain, mark the walls where your mortar should come up to.
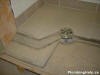 Following the directions on the bag for mixing. Using a latex modified thinset, begin building up the shower pan. The mortar should hold it’s shape when squeezed in your hand.
- Keep working the mortar with a trowel and float until it has a smooth slanting surface. Check with a level for proper grade.
- Allow approximately 24 hours to cure.
Installing The Membrane
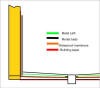
There are two types of waterproof membrane commonly used and both will work fine but I recommend the Kerdi membrane because its easier to work with.
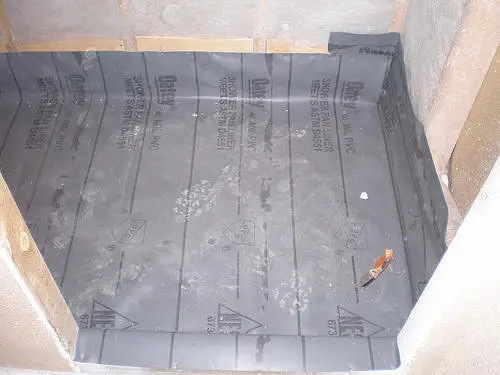
Kerdi waterproof membrane – Installed over the entire shower using a scratch coat of mortar as adhesive. The Kerdi membrane goes over the cement board. CPE waterproof membrane – Installed only on the base up about a foot along the walls. Staples hold the membrane in place. The cement board goes over the CPE on the walls. 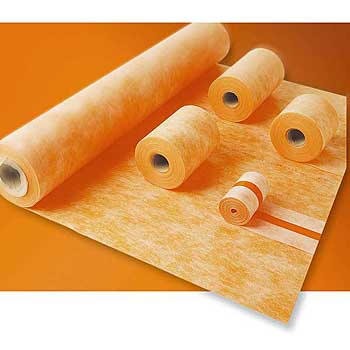
- Install the wall board before the membrane if using the Kerdi(orange).
- If your using the CPE membrane the wall board goes over the membrane that comes up the walls.
- Start by covering the floor area and curb with your waterproof membrane and fold in the corners.
- You can use preformed corners to add extra protection.
- If your using the Kerdi membrane cover the walls as well and overlap where the base membrane comes up the wall.
- Cut out the hole for your drain and weeping holes.
- Silicone under the edge of the membrane around the drain.
- Place the middle part of the drain flange over the membrane and bolt it down.
- Allow any mortar or glue some time to cure before finishing the shower base.
Finishing The Shower Base
- Install the shower drain cover to a height of 1-1/2″ (4CM) above the shower pan.
- Use a level to mark the walls at a height of 1-1/2″ (4CM) from the base, which will maintain the 1/4″ per foot grade.
- Cover the weeping holes of the drain with some small stones or pieces of tile, to keep mortar from plugging them.
- Mix up enough mortar to fill half of the base and spread it out over the base.
- Also give the curb a thin coat of mortar.
- Cut the metal lath to the size of the shower pan and curb. Keep a space (1/2″) around the drain.
- Apply more mortar over the metal lath until you reach the mark on the wall. Smooth it out with a trowel ensuring a good grade to the drain with a level.
- Allow 24 hours to dry.
Ready To Tile
- Check and recheck your tile layout before placing any mortar down.
- Start tiling on the base and curb then allow to dry for 24 hours before tiling the walls.
- Remove any mortar from the top and edges of the tiles before it dries.
- Ask the building supplier for the proper grout for the tiles you purchased. (sanded grout or non-sanded)
- After grouting each area wash it with a damp sponge before it dries to face of the tile or you will have an extremely hard time getting it off.
- Use a grout sealer on every grout line.
Now just install the shower control trim plate, handle, shower head and enjoy a beautiful shower that will impress everyone, especially when you tell them it was built by you.